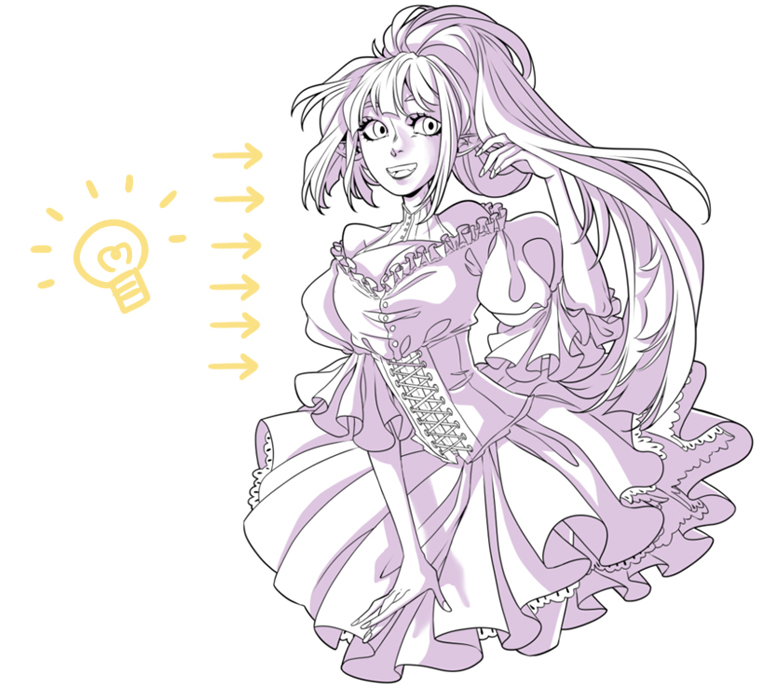
Art Piece With Woman With Giant Sleeves in Green
Hullo everyone~!
My name's Martina, simply on the cyberspace, I'm known every bit Mortinfamia 🙂
One of the things I'one thousand almost fond of when I think well-nigh an illustration is how to dress my characters. I have a affair for frilly wearing apparel, full skirts, puffy sleeves, and any kind of book: they look very dynamic in art and bring your characters to life!

Today we'll be making a wearing apparel with all these elements, and we'll see how to draw them easily with a few tricks.
I'm a comic creative person and a digital illustrator. For this tutorial, I used Clip Studio Paint because information technology'south the software I enjoy working with the almost (it'southward actually my main software). Still, apparently y'all can replicate it and follow it using any drawing software you lot are used to!
So, let's begin! But… where to get-go?
How to Depict a Basic Frill
The get-go step is to draw a wavy line, not too sharp, with soft edges. This is the most important line: it's the base for any kind of frill! And so, we need to draw the external office of the fabric's fold and mark where the seam is. Subsequently that, we're nearly done! To brand them wait prettier and more realistic, we need to sketch a few folds in the flattest parts to mimic real fabric.
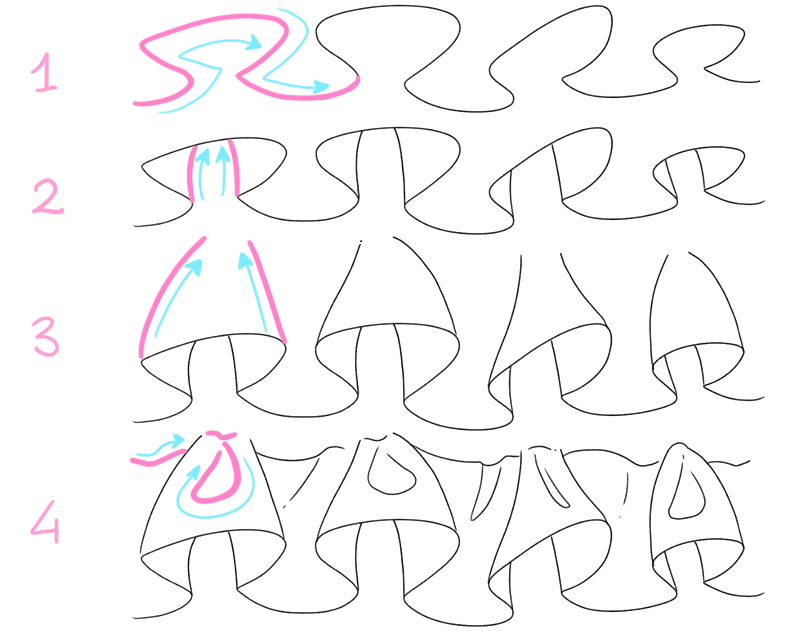
This is the footing for every ruche, pleat, or gather, and yous tin use the very same steps to frills as well. You might make them smaller to decorate lapels or blouses, or bigger for skirts.
The best part of this element is that it tin be part of the dress or exist a simple decoration for wearing apparel y'all think of equally likewise plain. It'southward all a matter of the ruches' or the frills' size!
Clothes your character
-
Drawing a skirt and some frills
Now, the almost important thing: how can we utilise these rules to create a real outfit?
First, we have to draft our grapheme. This might sound trivial, but it's actually essential: sketching the pose nosotros want before the dress makes it easier to accurately depict the physics of the fabric and fix what we think is off (proportions, physics of clothing, etc.). If we draw the wearing apparel blindly without a model to article of clothing, nosotros might leave too much room for anatomical mistakes, which might be hard to fix later.
Feel complimentary to ink the typhoon as I did, simply it isn't necessary.
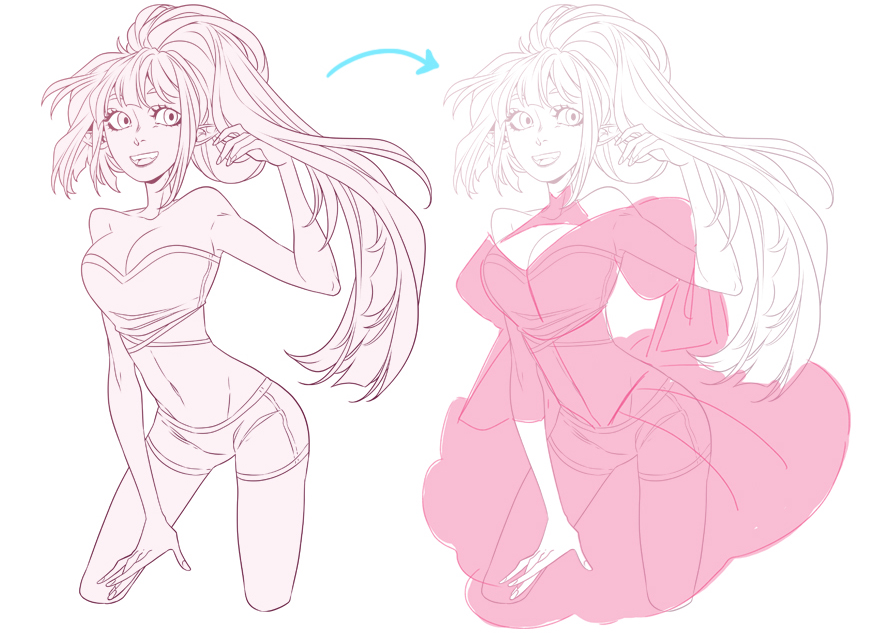
First, let'south sketch the wearing apparel on our character to observe a silhouette we similar! Once we're washed, we can add together all the details we have in mind.
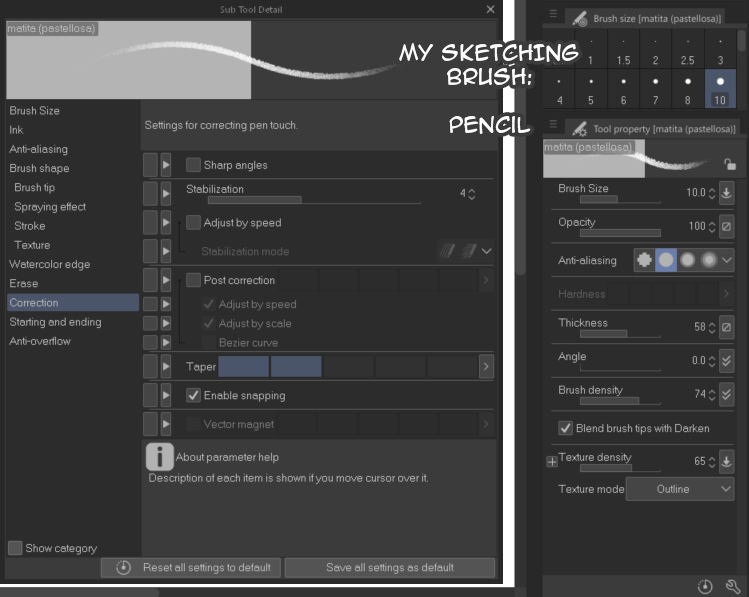
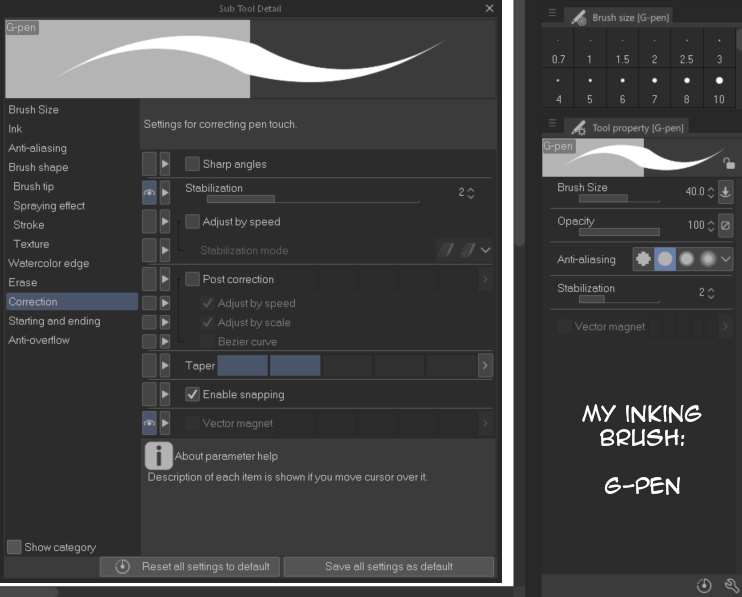
For all this planning part, I utilize my favorite sketching pencil! I use information technology with a point 4 in stabilization, and with a grade in antialiasing! You lot tin can see the settings I apply right here :>
Let'southward start with a blouse and apply what we merely learned—allow's decorate the neckline with some frills (i). I imagined my graphic symbol with a tight waistline, and so I think a corset over her blouse would arrange her well, and I'll add together some folds nether her breast to make the dress look a bit more realistic (2).
If nosotros want to draw puffy sleeves, hither'due south a tip! Imagine a wrapped slice of processed. Okay, at present picture the paper around the processed yet folded, only without the piece of candy inside: we would have ii tighter parts and a puffier i! That's what puffy sleeves should look like 🙂 (3)
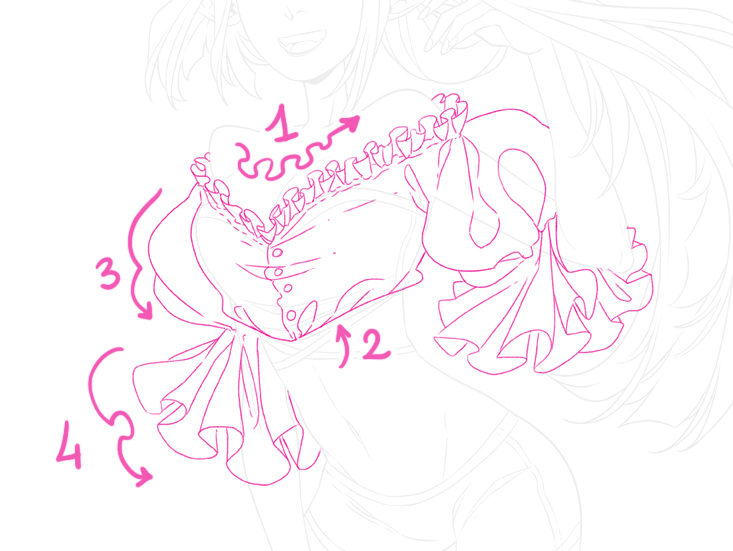
Allow's now commencement with the bottom part of the sleeve! (4) Pay attending to the fabrics' physics: remember that the wavy line of the sleeve's folds should get around the arm. You tin draw them quite large if you want a soft and voluminous fabric. Let's apply this same technique to the other sleeve.
Now the corset: we merely demand to follow the bustline down to the hips and leave the front a little open! (1) After that, we only demand to necktie the front together and add some seam details. (2) Note: There are a lot of different types of corsets, but this type is the simplest and fastest to draw. Y'all can change the type by shifting the corset's opening to the back, calculation some lace, or making it an underbust corset, which would make information technology end above the navel! I strongly suggest you browse the internet to take inspiration from some references! Websites similar Pinterest offer a lot of them.

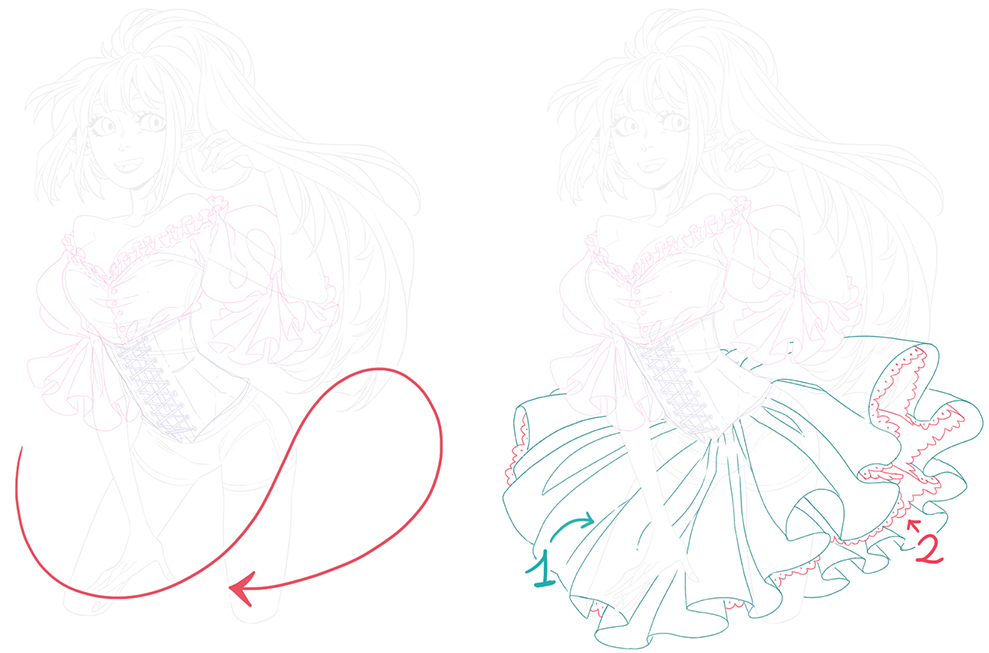
To draw the brim, nosotros can essentially resize the sleeves' frills and brand them bigger! The most useful affair you can practise to understand how the big folds should move is to draw a couple of guide arrows—they will prove united states how the skirt "flaps." (carmine line) Now, nosotros just need to describe the folds along them, to make information technology await natural!
Since I wanted the skirt to be manifestly and textureless, let'due south depict a petticoat (ii) under some folds to make the illustration a chip more dynamic and detailed: you can make a simple design, simply experience free to choose more complex ones if you similar! As I already said, taking inspiration from references is e'er a slap-up thought.
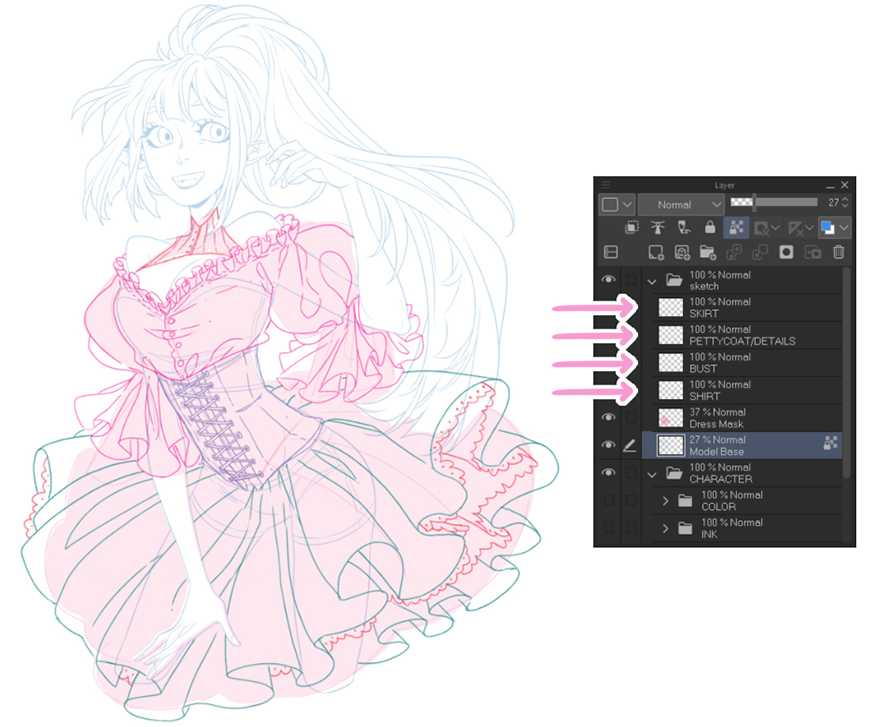
I'grand unremarkably very precise while working on an analogy. I always organize all the elements of my drawings in split up layers: it'southward something I exercise with circuitous illustration, only with elementary character design sheets as well. It helps me to know at first glance at what level the things are that I demand to add or delete, and it gives me the risk to edit things without touching the other elements of the cartoon.
My layers are named appropriately: SKIRT, PETTYCOAT/Particular, BUST, and SHIRT.
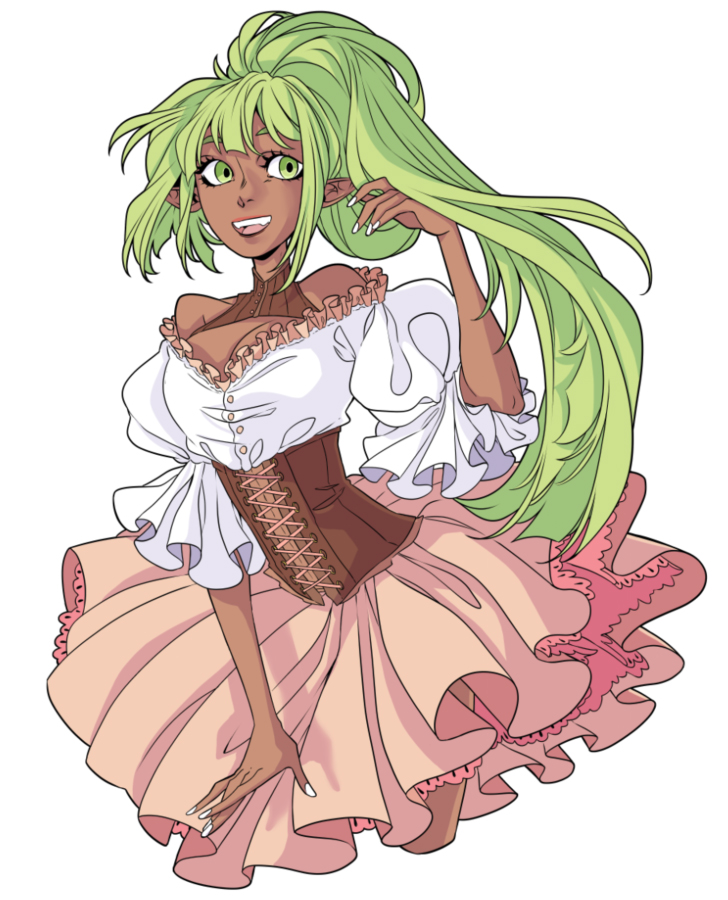
Our outfit is done!
-
Adding color
At present that our character is fully dressed, it'south fourth dimension to ink and color the illustration as nosotros similar. Let's bring our grapheme to life!
This is the brush I always utilise to ink, the G-pen! It's super smooth and precise, and information technology's perfect for clean line fine art (my favorite blazon!)
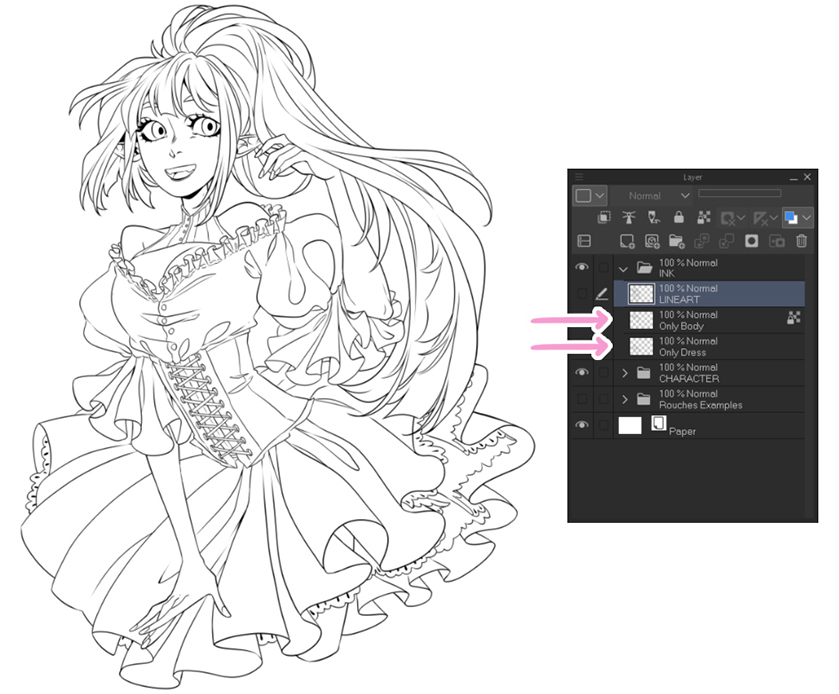
I had the line art of the body already washed, so I took the line art of her body to one layer, and I inked her outfit on another one, leaving the first 1 on a low opacity. My layers are named accordingly: LINEART, But Body, Only Dress.
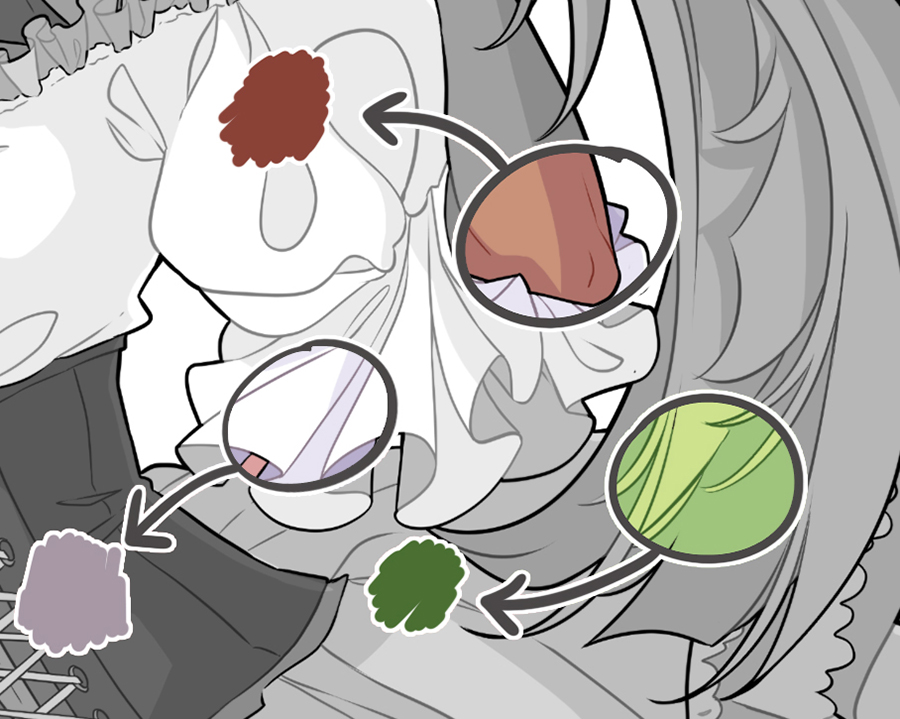
Once the graphic symbol is completely inked, I get with the shadows: I decide which way the light will striking my grapheme, and draw the shadows on the other side of her body.
Studying existent objects, how shadows, and low-cal work on real things, actually helps you learn how to properly shade your analogy! Every bit a matter of fact, at that place are and then many things to consider when yous shade your character: cast shadows, shades, wearing apparel thickness, etc. Shading theory is actually fascinating, and surely super useful for creating credible illustrations.
Once yous accept decided the direction of your source calorie-free (here it'due south on our left), I finish my shadows, and then I apply the flat colors of my choice.
The shadow level will be on elevation of the flat colors that I apply, and you can just fix the shadow layer to multiply! This way, it will perfectly blend with all the other colors underneath.
I would discourage you from using a plainly grayness or depression-opacity black for your shadows: use a light color, like a cute lilac, a warm pinkish, or a lite blueish. It adds more dynamism and personality to your analogy.
Nosotros are almost washed!
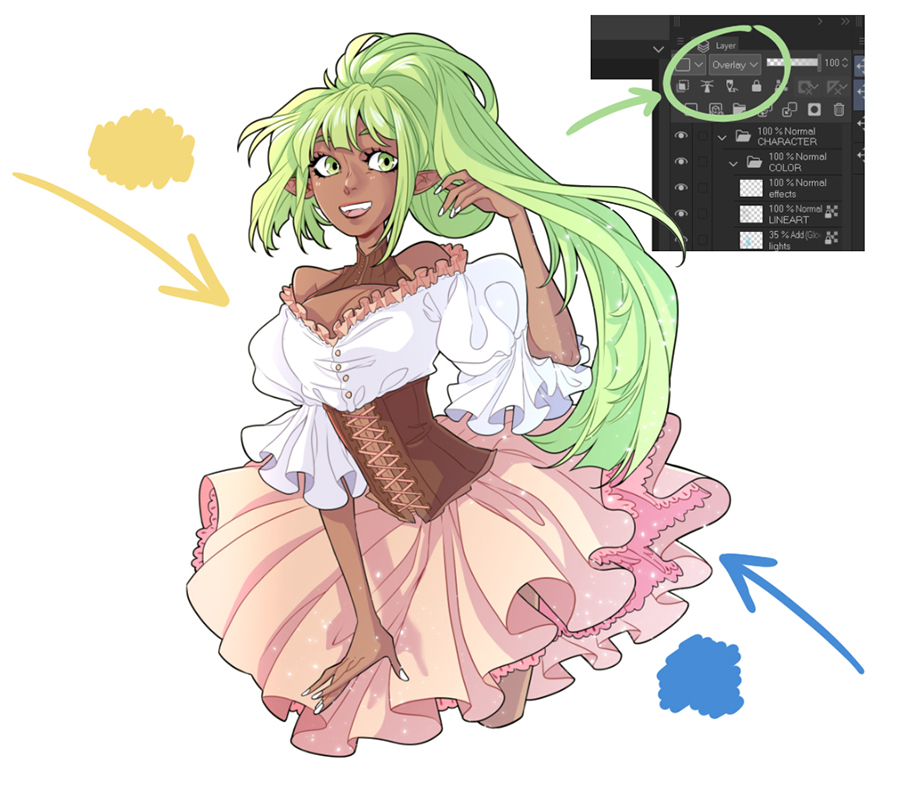
At this point, I commonly add some low-cal reflections on hair, eyes, and skin: I love these kinds of details, it gives a prissy "shining" effect to the character'south face and figure!
You can determine to leave this layer in normal mode, but I unremarkably set it to Overlay. This helps to alloy these details with all the whole of the drawing, and with the colors beneath.

The concluding touches I requite to my drawings are line art coloring and lighting. This is something I personally practice since I started drawing digitally: I don't similar my line art to be blackness and static, and so I paint them with a darker tone of the color they sit on.
For example, my grapheme's hair is greenish, so I used a darker green for the line art on her pilus. Same for her skin and clothing.
I really dear the effect of this technique, and I can't live without my colored line art!
As for the lighting, I just add together some final overall atmospheric touches with an overlay layer: I commonly apply two unlike colors (I personally combine a warm and a cool colour) and put them as a slope over the character. The first one, commonly the warm color, from the management I decided the calorie-free is coming, and the common cold color from the exact opposite management.
This passage helps give more complexity to the temper and the character's colors… and with actually little attempt!
And now, our illustration is finally consummate!

It goes without saying that if yous're reading this tutorial equally someone who just started drawing, it might be hard to create complex dresses and realistic frills right away, merely these steps will surely help you make them in the future too! Once you get the first steps right, you lot volition slowly figure out your own way to apply them to your cartoon style. If it doesn't turn out equally y'all wanted, don't requite up—continue cartoon! No one was born a genius; we all need a lot of practice and the will to learn and improve!
Perseverance—that'due south the key to better equally an artist!
I hope you liked this tutorial and had fun following it!
Thank you for reading!
Mortinfamia ~
About the Artist
My proper noun is Martina (AKA MortinfamiART), and I was born in Florence, Italian republic.
I went to an art high school for v years in my hometown, and I earned a diploma in Visual Arts: after that, I moved to another city, Bologna, to study at the Academy of Fine Arts, and after three years I got a Degree in "Comics and Illustration." I then returned to Florence and got a diploma in "Comics" after ii years in the International School of Comics.
I've worked a lot with digital commissions using social networks (Deviantart, Tumblr, and Facebook) since I was in high school. From 2014, I worked for several Italian publishing houses likewise.
From 2018 to 2020 I published my very ain comic trilogy "DEVA – A Tale of Gods" with an Italian publishing business firm, and from this year I started publishing my webcomic "Kamille" on Webtoon, while I'g planning the next i that will showtime around the cease of this twelvemonth.
Links:
My webtoon:
https://www.webtoons.com/en/challenge/kamille/list?title_no=402565
My social pages:
- Instagram: instagram.com/mortinfamiart
- Twitter: twitter.com/mortinfamiart
- Facebook: facebook.com/mortinfamiart
- Youtube channel: https://www.youtube.com/channel/UCShvjnPfFvITJxpYgxKkOzA?
0 Response to "Art Piece With Woman With Giant Sleeves in Green"
Post a Comment